
Hendrickson AIRTEK 2012 Service Manual – Factory Specs
Original price was: $35.75.$25.00Current price is: $25.00.
Factory service manual for Hendrickson AIRTEK front air suspension. 100 pages of torque specs, alignment procedures, and preventive maintenance schedules.
Description
Hendrickson AIRTEK 2012 Service Manual – Factory Specs for Your Front Air Suspension
If you’ve ever had a front-end alignment go sideways because the aftermarket manual gave you the wrong caster spec, you know the feeling. Wasted time, wasted parts, maybe a bent tie rod. I’ve seen it. I’ve spent 28 years in this shop torquing head bolts and chasing down suspension gremlins, and I will tell you flat: the Hendrickson AIRTEK 2012 Service Manual is the only document I trust for this front air suspension system. Not a reprint. Not a third-party paraphrase. This is the factory book, 100 pages, straight from Hendrickson. It covers both the STEERTEK NXT axle (after July 2011) and the earlier STEERTEK axle with Post’07 Engine. That distinction matters – the parts lists are different, and this manual calls them out separately in Section 4.
You’re not going to find generic illustrations here. Every diagram, every torque value, every inspection interval comes from the same engineers who designed the system. The suspension ride height directly affects driveline angles, especially when paired with a Manual Transmission. That’s why the ride height verification procedure (Section 8) includes specific measurements for dual and single height control valves. Ignore that and you’ll chew through u-joints.
Hendrickson AIRTEK 2012 Service Manual: 14 Sections of Factory Data
The manual is organized exactly like an OEM publication should be. Section 1 introduces the system. Section 2 gives the product description – they even tell you which Hendrickson Genuine Parts to use. Section 3 is the Important Safety Notice – read it before you put a wrench on anything. Section 4 has the parts lists broken down by build date and engine. You get separate listings for vehicles built with STEERTEK NXT axle after July 2011 and vehicles with STEERTEK axle and Post’07 Engine prior to July 2011. That level of specificity keeps you from ordering the wrong kingpin bushing.
Torque Specs You Can Trust – Page 94
Section 12 is where the torque specifications live. Page 94 lists every fastener torque from the clamp group to the kingpin nut. These are not ballpark numbers pulled from a generic chart. They are Hendrickson’s own validated tightening values. Need to re-torque the clamp group after initial service? The interval is on page 27 – first re-torque at 1,000 to 3,000 miles. I’ve seen shops skip that and then wonder why the axle shifts. Don’t be that shop.
Preventive Maintenance Schedules – Section 7
Section 7 covers component inspection, lubrication intervals, and re-torque schedules. Kingpin lubrication every 15,000 miles. Tie rod end lubrication at the same interval. The manual even tells you how to inspect the tie rod ends (page 25) and the thrust washer (page 32). If your truck is equipped with an axle wrap liner, there’s an inspection procedure for that too. This is the kind of detail that keeps the suspension tight over 500,000 miles. You also get shock absorber inspection and kingpin bushing wear limits – all factory specified.
Does This Cover the STEERTEK NXT Axle Removal?
Yes, Section 9 – Component Replacement – walks you through removing the STEERTEK NXT axle (page 67) and the earlier STEERTEK axle (page 71). The procedures are separate because the axles are different. You also get steering knuckle disassembly, kingpin measurement and preparation, bushing removal and installation, and reaming specs. Page 79 shows you how to measure the steering knuckle bore. If you’re doing a kingpin job, you need those numbers. The manual also includes the single-to-dual height control valve conversion procedure – page 86. That’s a common upgrade for vocational trucks.
OEM vs Aftermarket – Why This Manual Wins
I’ve been burned by aftermarket manuals more times than I can count. Wrong wiring, missing torque specs, alignment angles that don’t match anything. The Hendrickson AIRTEK 2012 Service Manual is printed from the original factory PDF. No one has rewritten the text or redrawn the diagrams. If you’re working on a Volvo truck with this suspension, you need the real thing. I’ve got the Hendrickson SOFTEK STEERTEK AIRTEK 2011 Service Manual on my shelf for earlier models, and the Hendrickson AIRTEK STEERTEK Freightliner Western Star Sterling 2010 Service Manu for other chassis. This 2012 manual is the Volvo-specific update. For a different suspension, the Hendrickson HAS Tandem/Single 1999 Service Manual Review covers the heavy-duty air suspensions. But for the AIRTEK front end, this is the one.
Alignment and Ride Height – Section 8
Alignment definitions start on page 35. The manual tells you what to inspect before you even touch the alignment – tire condition, ride height, steering stops. Front wheel alignment specs are in Section 13 (page 98). Ride height verification procedures cover both dual and single height control valves. Set it wrong and you’ll have a crabbing truck that eats tires. The toe setting procedure (page 46) gives you the correct measurement method. And the spring eye re-torque interval (page 47) is something most aftermarket books leave out entirely.
Safety First – Read Section 3 Before You Touch the Suspension
Page 5 starts the important safety notice. This isn’t a decoration – it covers jacking, supporting the axle, and handling air springs. The manual includes towing procedures (Section 6) because you can’t just hook a chain to an air suspension without following the correct steps. I don’t care how many trucks you’ve towed – read the section. Also, pay attention to the special tools list in Section 5. Some procedures require a kingpin reaming tool or a bushing driver. Trying to jury-rig it can damage the steerknuckle bore.
The troubleshooting guide (Section 11) covers common issues like ride height problems, steering pull, and air leaks. And if you’re swapping a Manual Transmission on a truck with this suspension, the plumbing diagrams in Section 10 show you the air line routing so you don’t pinch anything.
FAQ
- Does this manual cover the 2012 Volvo models?
- Yes – specifically for Volvo Trucks North America vehicles equipped with AIRTEK suspension.
- What torque values are listed for the kingpin?
- Page 94 gives you the factory torque specs for the kingpin nut, clamp group, tie rod ends, shock absorber bolts, and every fastener in the suspension. These are not generic values – they are specific to the AIRTEK system with STEERTEK NXT axle. Using aftermarket specs can lead to under-torqued joints that loosen or over-torqued components that crack. I’ve seen a thrust washer failure caused by an incorrect torque. This manual prevents that. You also get the re-torque intervals – for example, the clamp group needs re-torquing after the first 1,000 to 3,000 miles. That’s the kind of detail that saves you a comeback.
You don’t need to guess. You need the factory book. Access the Factory Manual from AutoRepairManuals and get the real specs.
Additional information
| Brand | Hendrickson |
|---|---|
| Language | English |
3 reviews for Hendrickson AIRTEK 2012 Service Manual – Factory Specs
You may also like…
-
Sale!
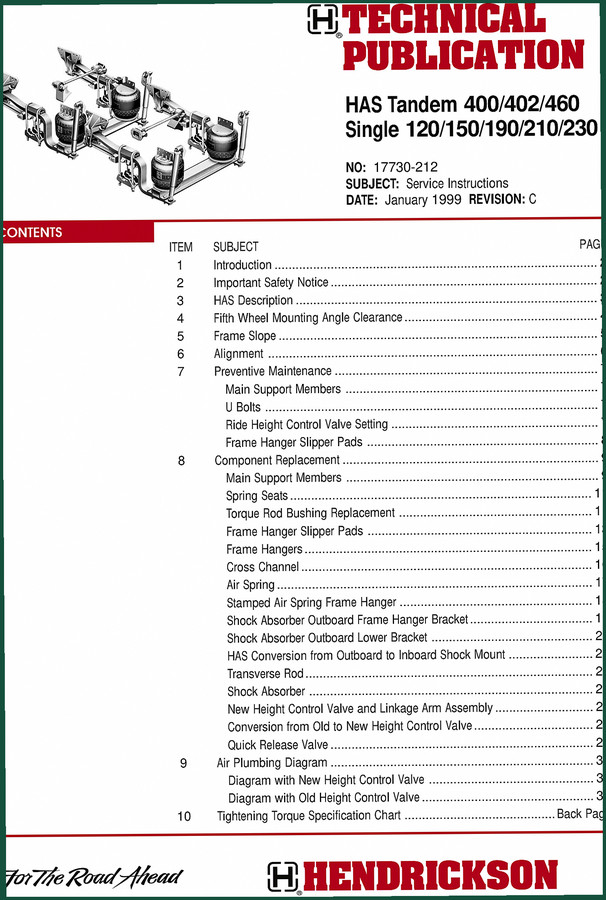
Hendrickson HAS Tandem, HAS Single 1999 Service Manual – Factory Specs
Original price was: $41.40.$30.00Current price is: $30.00. -
Sale!
Hendrickson AIRTEK STEERTEK 2010 Service Manual – 112 Pages
Original price was: $96.00.$60.00Current price is: $60.00. -
Sale!
Hendrickson AIRTEK, SOFTEK, STEERTEK 2011 Service Manual – Factory Torque Specs
Original price was: $70.20.$45.00Current price is: $45.00. -
Sale!
Hendrickson PRIMAAX EX 232, 462, 692, 262, 522 2012 Service Manual
Original price was: $36.00.$25.00Current price is: $25.00.
Related products
-
Sale!

Technical Manual – International DT 530 & HT 530 (118 Pages)
Original price was: $37.00.$25.00Current price is: $25.00. -
Sale!

Technical Manual – International 6.0L Power Stroke FICM Diagnostics
Original price was: $29.80.$20.00Current price is: $20.00. -
Sale!

International 1000-3000 Series Operators Manual – 132 Pages of OEM Specs
Original price was: $14.40.$10.99Current price is: $10.99. -
Sale!

2005 Parts Catalog – International NGD 3.0 L Engine (77 pages)
Original price was: $44.70.$30.00Current price is: $30.00.
diy_master –
I am extremely satisfied with this transaction. Instant access after checkout. A must-have for any Hendrickson AIRTEK mechanic doing maintenance. Highly recommended for mechanics.
Michael T. –
I am extremely satisfied with this manual. It is very easy to read on my laptop without blur. A must-have for any Hendrickson AIRTEK owner doing repairs. Saved my weekend project! Thanks.
workshop_guy –
This is exactly what I required. The file is high resolution. Contains clear bolt torque specs for Hendrickson. I will definitely buy again.